Archive | Vegetables RSS feed for this section

Strudel di Verdure (Vegetable Strudel)

24 Jun

When we think about strudel, we usually imagine the delicious pastry roll filled with apples, raisins and cinnamon, which is a traditional dessert of Trentino Alto Adige. The term derives from the German word “strudel” which means vortex; in fact, this stuffed roll, made with a very thin dough, is typical of the Italian regions that were part of the Austro-Hungarian Empire. The version that I propose here uses a different filling: fresh seasonal vegetables, sautéed in olive oil and flavored with fresh mint. A touch of robiola (anItalian soft-ripened cheese of the Stracchino family, (see focaccia di Recco) gives a creamy taste to this recipe. This tasty strudel is ideal as an appetizer or light vegetarian lunch. The preparation is quick and simple, and I recommend using puff pastry to speed things up. The traditional strudel dough is made of flour, oil and water and is pulled very thin, until it’s almost transparent; this is the secret and also the hardest part! You can also prepare the strudel in advance and then heat it in the oven a few minutes before slicing and serving.

STRUDEL DI VERDURE (VEGETABLE STRUDEL)
Preparation time: 50 min.                    Servings: 6

strudel di verdure fetta


INGREDIENTS
1 medium red onion
200 g (7 oz) zucchini, cut into julienne strips
200 peppers (7 oz), cut into julienne strips
200 g carrots (7 oz), peeled and cut into julienne strips
3 mint leaves, chopped
5 tablespoons of olive oil (extra virgin)
100 g (4 oz) robiola, soft cheese
3 tablespoons grated Parmesan cheese
Salt and freshly ground pepper
230 g (8 oz) puff pastry (disc)
1 beaten egg

DIRECTIONS
Preheat oven to 180 ° C
1. In a pan sauté onion over medium-low, just until soft. Add carrots and peppers. After a few minutes (about 5) add zucchini, and salt and pepper to taste. Cook for about 5-7 min., Vegetables should be crunchy. Add mint. When done, drain the vegetables on paper towels to remove excess olive oil
2. Place the puff pastry disc on parchment paper. Spread with vegetable filling, leaving a border of about 5 cm (2 inches). Distribute pieces of the robiola cheese on top and sprinkle with Parmesan cheese
3. Roll up the strudel and close the ends to seal in the stuffing. Brush with egg and bake on a baking sheet covered with parchment paper for about 35-40 min. Remove from oven and let stand on a rack for a few minutes. Serve warm. Paola

Peperonata

14 Jun

A simple and Mediterranean recipe but definitely enjoyed all over the world.
Peperonata (Pay-pay-row-NAH-ta) is a summer dish, since peppers are in season from June to September. Fruit and vegetables are definitely more tasty and full of flavor when they are in season. In summer I really like doing my vegetable shopping at the market, all stands are overflowing with bright colors and fresh fragrance. Peperonata is a simple dish made with bell peppers, onions, garlic and tomatoes, but it is very versatile; we can enjoy it as a side dish with meat (I love it with meatballs!), with fish such as cod, as an appetizer with toasted bread, or as a first course on pasta. I leave the choice to you! If you prefer a richer recipe, you can add some diced potatoes to the peppers. Instead, the Sicilian recipe adds toasted (in olive oil and garlic) bread crumbs before serving.

Another delicious summer recipe to enjoy with these vegetables is grilled pepper, a tasty appetizer or a side dish. Do not forget that peppers are very rich in water, about 90%, therefore they are an excellence choice for your summer diet.

PEPERONATA
Preparation time: 55 min. Cooking time: 50 min. Servings: 6

Peperonata
INGREDIENTS
1.2 kg bell peppers of different colors, cut into 1.5 cm strips
350 g Tropea onions (red onions) peeled and thinly sliced

garlic cloves
400 g peeled plum tomatoes cut into small cubes

6 tablespoons of olive oil (extra-virgin)
1 teaspoon sugar
1 teaspoon of dried chili pepper (optional)
Ground black pepper
Salt

DIRECTIONS
1. Peel the onions, wash and cut into thin slices.
2. In a pan heat the oil olive over medium heat, add onions and garlic. Sauté over medium-low heat for about 15 min. turning a few times with a wooden spoon until onion is soft and translucent.
3. Wash the peppers under running water. Remove the stalk, cut in half, then remove seeds and filaments. Cut the peppers into strips (1.5 cm, about 1/2 inch thick). Combine with the onion and garlic. Cook covered over medium-low for 15 min. Remove the lid, add the tomatoes, chilli pepper (optional), salt, pepper and sugar. Mix well and cook for about 15 min. until peppers are tender.

Note: I suggest to buy bell peppers of medium size, firm and meaty. The onions that I use are the red onions of Tropea (a city of Calabria), they have a delicate and sweet flavor. Paola

Tortino con Bietole ed Acciughe (Swiss Chard and Anchovies Pie)

29 Jan

This pie makes a colorful and a tasty starter or a delicious main dish. The crust is made ​​with brisee dough while the filling is prepared with Swiss chard, first boiled, then sautéed with anchovies and mixed with fresh ricotta cheese. This is a superb combination of flavors.

Swiss chard is native to southern Europe where it grows spontaneously. It belongs to the same family as beets and spinach; its bitterness fades when cooked, leaving a more delicate taste than spinach. Like all dark green vegetables, it contains large amounts of vitamin A, fiber and folic acid. It is a low-calorie vegetable and is therefore a perfect choice for a weight-loss diet, especially if eaten boiled and dressed with oil and lemon. Furthermore this tasty vegetable can be a nutritious addition to pasta (see pizzoccheri ) and soups!

 TORTINO CON BIETOLE ED ACCIUGHE (SWISS CHARD AND ANCHOVIES PIE)
Preparation time: 70 min.          Cooking time: 45 min.           Servings: 6

Tortino bietole fetta

INGREDIENTS
Brisee dough (see tortino al cavolo nero )
600 g (about 1 1/2 pounds) Swiss chard (leaves)
2 garlic cloves
3 anchovies “sott’olio” canned
3 tablespoons olive oil (Extra Virgin)
130 g (heaping 3/4 cup)  ricotta cheese
Salt and fresh ground pepper

DIRECTIONS
1. Prepare brisee pie crust 
2. Wash Swiss chard, cut off the white stalk (you can use in other recipes see note) and blanch the leaves for 8-10 minutes. Drain and let cool. Cut into segments of about 1 cm (0.4 inch) long
3. In a large skillet over medium-low heat sautée garlic in the oil for 4-5 min., being careful not to burn it. Chop the anchovies, add to the oil and stir until they beging to “melt”. Add chard, season with salt and pepper. Allow to cook for 10 minutes , stirring occasionally. Turn off the heat and let cool
4. In a bowl work ricotta cheese with a fork, add the vegetable mix and season with salt and pepper
5. Heat the oven to 170 °C (350 °F)
6. In a 25 cm (9 inch) round baking pan, roll out the dough to 2-3 mm thick, puncture the bottom with a fork, pour in the filling and bake for about 40-45 min. Serve warm.

Note: When you buy Swiss chard look for crisp, vibrant green leaves with non yellow or brown spots. You can enjoy the stalk as well. First boil them, then sautée in olive oil with garlic and pepper. Serve warm with grated Parmesan cheese. The cheese will melt and give a special taste to this dish. – Paola

Zuppa del Contadino (Farmer’s Soup)

14 Jan

This is a dish that makes you rediscover the rural tradition and colors of the season! This soup is a great main dish, perfect for a cold, winter day. It ‘s simple but very nutritious, because it is made of legumes and vegetables. Legumes, in fact, are an excellent source of protein, fiber, minerals (calcium, potassium, iron) and B vitamins. In the past, legumes were considered the meat of poor people, and were commonly present on the peasants’ table. The recipe that I am proposing contains a mix of dried legumes such as beans, lentils, soybeans, chickpeas, peas and beans. And to make this dish even more tasty, I prepare a soffritto with onion, garlic, celery and carrot. The preparation is very simple, but it requires a bit of time, because legumes have to be soaked in water before cooking. To save time you can use a pressure cooker, which reduces the preparation time without sacrificing taste. You can top this soup with croutons or grated parmesan cheese or, if you prefer, you can put a few drops of hot chili olive oil before serving.

FARMER’S SOUP
Preparation time: 5 hrs.    Cooking time: 40 min.      Servings: 6

Zuppa del contadino

INGREDIENTS
450 g (1 pound) mix of dried legumes
1 onion, finely chopped
2 cloves of garlic, finely chopped
2 carrots, cut into slices
1 leg of celery, sliced
1 potato, cut into cubes
2 bay leaves
4 tablespoons olive oil
2 tomatoes, diced
Salt and freshly ground pepper

DIRECTIONS
1. In a large bowl soak the legumes for about 4 hours with bay leaf. Drain and place in a large pot and cover with cold water. Bring to boil, cook over medium heat for about 20 min. Drain, remove the bay leaf and set aside.
2. In a saucepan over medium-low heat saute onion, garlic, carrot , celery and potato in the olive oil for a few minutes. Add the legumes mix and cook over high heat for a few minutes, stirring with a spoon. Add the tomatoes and cover with plenty of water. Cook covered for about 20-25 minutes until all the legumes are tender (the exact cooking time should be indicated on the package). Add salt and freshly ground pepper to taste.
Note: When cooking legumes, it is important to add salt only at the end, because the addition of salt at the beginning will make the legumes less tender. It is also important when cooking to maintain a constant temperature. Paola

Crespelle con Zucchine e Crescenza (Crepes with Zucchini and Crescenza Cheese

8 Jan

Crepes with zucchini is a delicious and appetizing dish that you can serve either as a first course for an important dinner or as a main dish for a light lunch. Crescenza is a soft, fresh, creamy cow cheese that has a delicate and mild taste. It gives a delicious flavor to this recipe. If you cannot find crescenza cheese, I would recommend to use either Brie or Camembert cheese without the rind. First crepes are filled with the zucchini stuffing, baked in the oven with some bechamel sauce and then covered with tomato sauce.  Crepes are typical of French cuisine, but not only. In fact, in the province of Teramo (Abruzzo) they are commonly prepared and are called “scripelle”. They are used in various recipes such as pies or stuffed with Pecorino d’Abruzzo cheese, rolled and poured into chicken broth (called “scripelle’ imbusse ). In Salento, however, they are cooked longer. Therefore, they are more crisp and are eaten like a snack. I prepare crepes with a variety of fillings such as spinach and ricotta cheese, mushrooms, asparagus, ham and cheese. My kids love them as a dessert filled with Nutella, a special treat for children (and adults, too!).

CRESPELLE CON ZUCCHINE E CRESCENZA (CREPES WITH ZUCCHINI AND CRESCENZA CHEESE)
Preparation time: 1 h   Cooking time: 20 min.  Servings: 4
Crespelle con zucchine e crescenza

INGREDIENTS
120 g  (¾ cup) flour
240 ml (1 cup) milk
2 eggs
2 tablespoons melted butter
6 medium zucchini, diced
2 cloves of garlic
3 tablespoons olive oil (Extra Virgin)
200 g (about 1 cup) crescenza cheese
120 g  (¾ cup) ricotta cheese
3 tablespoons grated Parmesan cheese
2 teaspoons chopped parsley
salt and pepper
250 g (about 1 cup) bechamel sauce
6 tablespoons of tomato sauce

DIRECTIONS
Crepes
1. In a bowl combine flour with a pinch of salt. Add milk with a whisk until butter is uniformly smooth. In a small bowl, beat eggs with a pinch of pepper. Combine the milk mixture with eggs. The batter should be runny, if it is thick add a few tablespoons of milk. Add melted butter, whisking vigorously, cover with cling film and leave to rest for about 30 minutes in the refrigerator .
Grease with butter the bottom of a non-stick 18 cm (7 inch) pan over medium heat and pour a ladle of batter in the center, maneuvering the pan to distribute the batter over the entire surface. Cook for about a minute. When the crepe comes off easily from the pan and is golden brown, turn it with a spatula and cook the other side for 30 seconds. Keep the crepes under a damp cloth to prevent them from drying out.

Heat oven to 180 °C (350 °F)

Filling
1. Wash zucchini, remove ends and cut into cubes. In a non-stick skillet over medium-low heat sauté the garlic in olive oil, being careful not to burn it. Remove garlic and add zucchini. Cook over medium heat for about 10 minutes, stirring a few times. Season with salt and pepper, and set aside. In a bowl mix crescenza and ricotta until the mixture is creamy. Add Parmesan cheese, salt and pepper to taste. Stir and add  zucchini
2. Fill half crepe with stuffing and close like a book. Complete this procedure until you have used all the filling. If you have some crepes left,  wrap with cling film and freeze. Place the crepes on the bottom of a buttered baking pan. Cover with some bechamel sauce and bake for 10 min. Meanwhile heat the tomato sauce with a tablespoon of butter, salt and pepper. Remove the crepes from the oven, add 1 tablespoon of tomato sauce on each one, bake for additional 5 min. Remove from oven, let stand 1-2 minutes and serve with some grated Parmesan cheese on top. – Paola

Lenticchie in Umido (Lentil Stew)

30 Dec

This lentil stew is a tasty and comforting recipe that was always present on our dinner table on New Year’s Eve. Lentils are usually served on New Year’s Eve as they are thought to bring good luck and money, regardless if they do, they are delicious. Traditionally my mom made this recipe with bacon. Instead, I omit bacon, therefore it is a perfect vegetarian dish. Nutty and earthy flavor, lentils have nutritional value (see Insalata di Lenticchie). You can serve this dish with cotechino, the Italian sausage, that is traditionally eaten on New Year’s Eve too.

LENTICCHIE IN UMIDO (LENTIL STEW)
Preparation time: 30 min. Cooking time: 20 min.  Servings: 4

Lenticchie in umido

INGREDIENTS
310 g (11 oz) lentils
1 onion, finely sliced
1 clove of garlic, finely sliced
1 carrot, sliced
1 celery stem, finely sliced
2 bay leaves
4 tablespoons olive oil (Extra Virgin)
120 ml (1/2 cup) white wine
1 tablespoon tomato sauce
Vegetable broth
Salt and freshly ground pepper

DIRECTIONS
1. Make “soffritto”. In a saucepan on medium-low heat sautee onion, garlic, carrot and celery in olive oil for a few minutes. Rinse lentils under running water. Add lentils to the “soffritto” and cook on high heat for a few minutes, stirring with a wooden spoon. Add wine and let it evaporate. Add tomato sauce, bay leaves and cover with plenty of broth
2. Cover with a lid and cook for about 18-20 minutes until lentils are tender  (the exact cooking time will be indicated on the package ). Add salt and freshly ground pepper to taste. -Paola

Fettuccine al Pesto “Ricco”(Fettuccine with “Rich” Pesto)

8 Dec

Fettuccine with “rich” pesto (also called ” avvantaggiato”, or advantaged) is the ancient version of pasta with pesto that is commonly enjoyed in Liguria today. This recipe is made ​​with potatoes, green beans and pesto. The addition of potatoes and green beans makes this dish truly appetizing, a real delight for those who love vegetarian dishes, including myself! The trick lies in the choice of fresh vegetables and homemade pesto (see lasagne al pesto); this naturally enhances the flavor and aroma of this meal. The pasta that I usually use is artisanal pasta, made ​​with organic flour. I bought the one I used for this recipe in Tuscany during my summer vacation. The color and the taste is a little bit different (more rustic) from mass-produced pasta. The preparation of this recipe is simple, but requires some skill to cook the vegetables. The original recipe for rich pesto calls for cooking the vegetables with the pasta, but the cooking times are different, and therefore to facilitate the preparation, I recommend cooking them separately. You can cut the green beans into larger or smaller pieces, depending on your taste. Fettucine can be substituted with linguine, both of which complement the pesto very well. This dish is certainly a delicious primo piatto (first course) for a cozy dinner or piatto unico (main course) for lunch.

FETTUCCINE AL PESTO “RICCO”(FETTUCCINE WITH “RICH” PESTO)
Preparation time: 25 min.     Cooking time: 6 min.          Servings: 4 Fettuccine al Pesto Ricco INGREDIENTS

340 g (12 oz) fettuccine
2 medium potatoes 150 g (5 oz) fresh green beans
2 tablespoons olive oil (Extra Virgin)
4 tablespoons pesto
Salt pepper
Grated pecorino cheese

DIRECTIONS
1. Clean the beans by breaking off the ends and rinsing under running water. Boil in water or steam (even better). Drain when they are still crunchy. Keep warm
2. Wash the potatoes and cook in salted water or steam until they are tender. Allow to cool, peel, dice into 1.5 cm (1/2 in.) cubes. Keep warm
3. In a saucepan, bring 3 liters of salted water to a boil. Add the pasta and cook according to the instructions on the package. Strain and pour into a serving dish, season with olive oil, potatoes and green beans. Garnish with pesto and add some freshly-ground pepper to taste. You can also top with parmesan or pecorino cheese! – Paola

Crocchette di Patate (Potato Croquette)

6 Oct

Potato croquette is a small breaded, fried potato roll, usually shaped into a cylinder. It is an Italian classic that can be served either as a tasty appetizer or a fancy side dish. A plate of croquettes becomes something a bit more special when stuffed with cheese or ham, and it can even be served as a main course, delighting both kids and adults. My kids love when I prepare them, they disappear in a blink of an eye!  The term croquette originates from the French croquer “to crunch”.  Croquettes are easy and quick to prepare, but in spite of this the result is spectacular. The use of simple ingredients, such as mashed potatoes, eggs, Parmesan cheese and spices, provide a soft texture and a delicate and appetizing taste. Of course, frying adds an extra mouth-watering flavor.

CROCCHETTE DI PATATE (POTATO CHROQUETTE)
Preparation time: 40 minutes                            Servings: 8 Crocchette di patate

INGREDIENTS
800 g (28 oz) potatoes
100 g (1 cup) grated Parmesan cheese
1 egg yolk
Grated nutmeg, a pinch
Salt and freshly ground pepper, to taste
2 eggs
Breadcrumbs
Oil from frying

DIRECTIONS 
1. Cook the potatoes until just tender either by boiling or baking.  The potato flesh for croquette should be dry, therefore it is better to boil the potato in the skin to prevent water absorption.  Drain well and set aside until just cool enough to remove the skin.  The potatoes should be warm
2. Put the warm potatoes through a potato ricer (never a mixer) into a bowl, season to taste with salt, nutmeg and pepper. Add the egg and Parmesan, mix just enough until the dough is formed
3. Take an abundant tablespoon of dough and make a cylindrical shape. In a bowl beat the eggs, one at a time pass each croquette in the egg then in breadcrumbs . Continue until all the dough is finished
4 . In a frying pan (better in a deep fryer ) heat plenty of peanut oil to 180° C (350° F) . If you do not have a cooking thermometer to check the temperature, you can test with a small piece of bread . If after 60 seconds is colored, the oil temperature is perfect. Put 3-4 croquettes at a time into the pan, in this way you prevent to lower the temperature of the oil 5 . When they are evenly gold, remove with a slotted spoon and place on a plate covered with paper towels. Serve hot.

Note: The type of potatoes is crucial (I strongly recommend to use patate farinose, rich in starch) as well as the potato ricer. – Paola

Linguine con Zucchine e Pomodorini (Linguine with Zucchine and Cherry Tomatoes)

22 Sep

Pasta with zucchini is a simple dish, quick and tasty that can be prepared in different ways. This recipe is made with linguine topped with zucchini and cherry tomatoes sautéed in olive oil and garlic. Linguine is a type of long pasta similar to spaghetti, but it is wider and flatter. It looks somewhat like fettuccine. In Italian the name linguine means “little tongues”, this might be related to its long shape. This healthy and colorful first course is also perfect for a light meal when you want to avoid weighing yourself down. In my opinion, pasta enhanced with fresh seasonal vegetables is best described as joy for your palate.

LINGUINE CON ZUCCHINE E POMODORINI (LINGUINE WITH ZUCCHINE AND CHERRY TOMATOES)
Preparation time: 20 minutes    Cooking time: 12 minutes      Servings: 4

Linguine con Zucchine e

INGREDIENTS
340 g (12 oz) linguine, artisanal pasta
8 medium zucchini
500 g (18 oz) cherry tomatoes
6 tablespoons extra virgin olive oil
3 cloves garlic, whole
Salt and pepper

DIRECTIONS
1. Bring to boil 3 liters of salt water.
2. Meanwhile, wash the vegetables under running water. Remove the ends from the zucchini and cut into cubes. Cut cherry tomatoes in half.
3. In a pan heat oil and sauté garlic over medium-low heat, taking care to not letting it burn. Add zucchini and tomatoes. Cook over medium-high heat for 5 minutes, stirring gently. Remove garlic.
4. Cook linguine for 12 minutes (check the cooking time on the package). Drain pasta, add to the vegetables in the pan and toss. Season with salt and pepper. Serve hot with grated Parmesan cheese or seasoned ricotta in flakes.

Note: My dear readers you might have noticed that in my recipes the amount of vegetables is always abundant; this is because I love vegetables. I’m not a vegetarian, but fruits and vegetables are mainstays of Italian cuisine and are always present in abundance on my table.  They are the basis of a healthy, Mediterranean diet!  -Paola


Caponata (Eggplant Stew)

20 Aug

Caponata is a delicious dish, typical of the Sicilian cuisine made with sautéed vegetables (mostly eggplants) and seasoned with sweet and sour sauce.  Sicilians are very proud of it because it is made only native Sicilian ingredients. It can be served cold either as an appetizer or as a side dish, but you can also enjoy it as a main course with a thick slice of homemade bread. It makes a perfect dish for a summer picnic because it can be prepared in advance and stored in the refrigerator.  Actually, it is a handy dish to have ready in your fridge for unexpected guests or nights when you don’t know what to prepare. Like for all recipes, there is a basic recipe and many variations. I learned this recipe which contains peppers from a dear friend from Palermo (Sicily). The origin of this dish is uncertain -: The etymology refers to the Spanish language “caponata” which means “similar”.  According to the Sicilian tradition, the term caponata comes from “capone” which is the name of an expensive fish, served with a sweet and sour sauce, typical of caponata.  Poor people could not afford this expensive fish, therefore they replaced it with the cheapest eggplants.  According to other sources, the name derives from “caupone“, the name of the taverns, in which this dish was served. Regardless this recipe’s origins, the fact is that it is really tasty, definitely something to try!


CAPONATA (EGGPLANT STEW)
Preparation time: 2 ½ hours   Cooking time: 30 minutes    Servings: 8

Caponata (2)


INGREDIENTS
900 g (2 pounds) eggplant
2 medium onions, finely chopped
450 g (1 pound) celery, finely chopped
110 g (⅔ cup) pine nuts
150 g (1 cup) green olives
3 tablespoons cucunci capers (preserved in salt)
450 g (1 pound) peppers
450 g (1 pound) tomatoes S. Marzano, peeled and chopped
2 tablespoons sugar
110 ml (½ cup) white wine vinegar or apple cider vinegar
5-6 leaves of fresh basil
Extra Virgin olive oil
Salt and pepper

DIRECTIONS
1. Cut eggplants into pieces about 2,5 cm (1 inch) long, put them in a large colander and sprinkle with coarse salt. Allow to stand for at least two hours under a weight to remove their bitter liquid. To aid the removal of the liquid, try putting the colander in a slightly inclined position. After two hours, remove salt from the eggplant with a kitchen brush and dry by patting them with paper towels. Fry in hot oil olive. Set aside
2. In a pan with high sides, sauté onions, celery, peppers, capers, olives and pine nuts in olive oil for about 7-8 min. Add tomatoes. Cook for about 10 minutes over low heat until celery is tender
3. Add eggplants, basil leaves and sugar dissolved in vinegar. Mix well and cook over medium-low heat for about 5-6 minutes. Season with salt and pepper
4. Let set for a few hours serve at room temperature.

Note: The caponata can be stored in the refrigerator for several days in a glass or ceramic container closed with a lid. Before consuming, leave it at room temperature.  -Paola


Insalata di Ceci (Chickpea Salad)

20 Jun

This is refreshing and healthy salad made with chickpeas, olives, tomatoes and onions, flavored with olive oil and fresh basil making this salad even more delicious.  This is a perfect vegetarian dish for a light summer lunch and is best served fresh “just made” and at room temperature to heighten the flavor of tomatoes and basil, although you can also refrigerate it and eat the next day. Chickpeas – or garbanzo beans – are legumes rich in protein, zinc, B vitamins, folate and fiber, but also low in fat and most of which is polyunsaturated: good friends for your heart!!! They are one of the earliest cultivated legumes: 7,500 year-old remains have been found in the Middle East. They are largely cultivated in the Mediterranean area and are well known in Italian cuisine. The Mediterranean chickpeas have lighter color, larger seed and smoother coat in comparison to Asian ones. I love their buttery taste, like a combination of chestnuts and beans,  and I enjoy them in everything: salads, stews, pasta (the delicious pasta e ceci), in fritters and farinata.

INSALATA DI CECI (CHICKPEA SALAD)
Preparation time: 1h 40 min. Cooking time: 70-90 min. Servings: 4

Insalata di Ceci

INGREDIENTS
280 g (10 oz) dry chickpeas
1 bay leaf
450 g (1 pound) cherry tomatoes
1 shallot, finely sliced
3 tablespoons Taggiasche olives
1 tablespoon lemon juice
3 tablespoons olive oil (Extra Virgin)
Basil
Salt and freshly ground pepper

DIRECTIONS
Day 1
You should start the day before you plan to serve the salad.
1.Rinse the beans under running water, then place in a large glass bowl with bay leaf.  Fill bowl with plenty of water to cover generously (about 5 cm, 2 inches above the level of the chickpeas).  Cover with a lid and soak overnight.
Day 2
2. Drain soaking water, put chickpeas into a pan with fresh water and cook until they are tender, from 70 to 90 minutes, depending on how fresh the chickpeas are. A few minutes before they are done add some salt. The cooking time should be indicated on the package
3. Fifteen minutes before removing chickpeas from the stove , cut the tomatoes, add some salt and let them rest for 10 minutes
4. Drain tomatoes in a colander.  Slice onion and chop basil.  In a large bowl mix all together with the olives and olive oil
5. Drain the chickpeas well, add lemon juice and mix.  Add to the vegetable mix
6. Season with salt and pepper to taste. Let the salad rest for 10-15 minutes and serve at room temperature.

Note: You can use canned chickpeas (about 1 pound) but the taste of dry ones is more buttery and exquisite.  If you use canned ones drain into a colander and rinse with cold water until no more foam appears.  -Paola

Risotto ai Fiori di Zucca (Zucchini Flower Risotto)

17 May

Whenever I think of spring, I think of flowers.  In spring Italian markets are filled with bright yellow-almost orange edible zucchini flowers. There are two types of zucchini flowers: female and male flowers.  The female flower is a golden blossom on the end of each new zucchini, while the male one grows directly on the plant stem. Like zucchini, zucchini flowers are good source of vitamin C, potassium and folate.  Zucchini flowers can be sautéed, stuffed with cheese, battered and fried, or added to pasta and risotto. Risotto is one of my favorite ways of eating zucchini flowers. This is a healthy, delicate, colorful and elegant dish. The flowers add a sweet taste to the risotto.  This is a perfect vegetarian and gluten-free dish.

RISOTTO AI FIORI DI ZUCCA (ZUCCHINI FLOWER RISOTTO)
Preparation time: 25 minutes    Cooking time 16-18 minutes     Servings: 4

Risotto fiori di zucca

INGREDIENTS
500 ml (approx. 2 cups) vegetable stock
450 g (1 pound) new zucchini with flowers
80 g (6 tablespoons) unsalted butter
1 medium shallot, finely chopped
300 g (1 ½ cups) Italian Carnaroli or Arborio rice
120 ml (½ cup) dry white wine
50 g ( ½  cup) grated Parmesan cheese
Salt and freshly ground white ground pepper

DIRECTIONS
1. In a saucepan over medium low heat, warm up the stock2. Cut off the flowers from the zucchini and remove the pistil. Wash the zucchini and the flowers. Dice the zucchini and slice the flowers into thin strips
2. In a large saucepan heat 50 g (4 T) of butter. Add the chopped shallot, and sauté for 2-3 minutes over medium heat. Add the rice and stir thoroughly for about 3 minutes, in order to “coat” the rice well with the butter and shallot. (This helps regulate absorption of the wine.).  Add the wine and stir until completely absorbed
3. Add a soup ladle or two of the stock until the rice is just covered, and stir continuously with a wooden spoon. When the stock is almost completely absorbed, repeat this process for about 9 minutes. Add the diced zucchini and the flowers and one more ladle of stock.  Cook for another 6-7 minutes until the stock is nearly absorbed. If you prefer softer zucchini, add the diced zucchini at the beginning with the shallot. It depends on the rice’s cooking time, which should be clearly indicated on the package.
The end of the cooking is critical for the final texture of the dish, so when the rice is nearly tender to the bite, but with just a hint of resistance (al dente), and the liquid you have added up to this point has been mostly absorbed (the risotto should still seem a bit “soupy”), add the Parmesan and butter to taste, about 30 g (2 T).
4. Remove your risotto from the heat. At this point, keep stirring the risotto to blend in the cheese and butter. You can also add some salt and freshly ground pepper to taste. Let it stand for 1 or 2 minutes. Arrange the risotto on a serving dish, serve immediately (plan your timing well – it is very easy to overcook risotto!).

Note: When you buy the zucchini flowers, choose firm flowers that are mostly closed. They keep a few days in the refrigerator in tightly sealed containers.  – Paola


Insalata di Farro e Verdure (Farro and Vegetable Salad)

28 Apr

The fresh vegetables make this salad a perfect and colorful dish to celebrate the flavors of spring.  Farro is an ancient grain, a variety of wheat called emmer.  It was used by the Etruscans, Egyptians and the Romans. Nowadays it is cultivated especially in northern Tuscany, in the province of Lucca. Farro has a delicious nutty and earthy texture that makes it a wonderful choice for entrees, soups, side dishes and salads. It is a versatile ingredient, as well as being highly nutritious. Farro is rich in proteins, dietary fibers and magnesium; it is a good source of vitamin A, C, E and vitamin B complex, and it is low in fat. It has a very low glycemic index, making it also suitable for diabetics. I use farro perlato (pearled farro, from which a portion of the outer bran has been removed) instead of whole farro for my recipes, because it cooks faster and does not requiring soaking. In fact, farro perlato cooks in only 20 minutes. This is a quick, easy and tasty recipe to prepare, something you can eat either warm or cold. The sautéed and sweetly flavored vegetables combined with the nutty farro make an irresistible vegetarian dish.

INSALATA DI FARRO E VERDURE (FARRO AND VEGETABLE SALAD)
Preparation time: 35 minutes                            Servings: 8

Insalata di Farro

INGREDIENTS
320 g (1 ½ cups) farro perlato
8 tablespoons olive oil (Extra Virgin)
1 medium onion, chopped
2 garlic cloves
1 red chili pepper, finely sliced
3 carrots, finely cubed
1 red pepper, finely cubed
1 fennel, finely cubed
3 zucchini, finely cubed
250 g (2 cups) fresh peas (or frozen)
Salt and freshly ground pepper to taste
Parsley, basil or mint for decoration

DIRECTIONS
1. Rinse the farro in cold water and drain
2. Bring 4 cups of salted water (about 7 g,  1 ½  teaspoons of salt) to boil, add the farro, reduce heat and cook covered with a lid for 20 minutes (cook according to the directions on the package).  It should be firm and chewy
3. While the farro is cooking, in a non-stick pan sauté scallions, garlic and red chilli pepper in olive oil over medium heat for 4 minutes, stirring frequently
4. Add the carrots and pepper, toss for a few minutes
5. Add the fennel and zucchini, cook for 5 minutes. At this point add the peas and cook for additional 3-4 minutes stirring a few times to prevent burning. The cooking time for the vegetables can vary according to your taste: crispy versus soft and well cooked.  I go for crispy!
6. After 20 minutes drain the farro and add it to the vegetables. Toss to mix all the ingredients well! Add salt and pepper to taste.  You can serve it either warm or cold. Decorate with parsley, basil or mint.

Note: Instead of farro perlato you can use regular farro (cooking time is different) or any large grain. I would suggest brown rice for a gluten free version. -Paola

Orecchiette con Cime di Rapa (Orecchiette Pasta with Broccoli Rabe)

10 Apr

Orecchiette with broccoli rabe or rapini is one of the most representative dishes of Apulia (especially of the Bari area), and symbolizes the region’s so called “cucina povera” (peasant cooking).  It is a tasty and healthy dish made with orecchiette pasta and broccoli rabe.  The slightly bitter flavor of this leafy dark green vegetable blends well with the starchy taste of pasta and the hot bite of fresh chili pepper.  Orecchiette means “little ears” because of their shape; they are little concave disks.  Orecchiette are made with semolina, flour and water.  They are prepared by pressing a small amount of dough with one’s thumb pressure to create the characteristic depression. According to some legends, their shape also recalls the roof of the trulli constructions, the typical Apulian houses. The best orecchiette are, of course, homemade, but good ones also produced by some Italian pasta makers. The broccoli rabe, a leafy green vegetable and typical of Southern Italy, is very tasty and suitable for several pasta recipes.  There are mainly two types, one from Bari with a tough stalk and a lot of leaves and another one from Naples  (also known as friarielli) with a more tender stalk. If you prefer a milder taste you might use broccolini or regular broccoli. I personally love the bitter taste of broccoli rabe.  Apulia is not only known for its delicious food, but also for its traditional ceramics. You can admire the artistic decoration of the ancient plate (more than 100 years old) shown in the picture below.

ORECCHIETTE CON CIME DI RAPA (ORECCHIETTE PASTA WITH BROCCOLI RABE)
Preparation time: 25 minutes    Cooking time: 20 minutes         Servings: 4

Orecchiette Piatto_small

INGREDIENTS

600 g (21 oz ) broccoli rabe
450 g (16 oz) fresh orecchiette pasta
6 tablespoons olive oil (Extra Virgin)
2 garlic gloves, coarsely chopped
2 fresh hot chili peppers, seeded and finely sliced
4 salted anchovies, rinsed and coarsely chopped
4 tablespoons freshly grated pecorino
Salt

DIRECTIONS
1. Wash the broccoli rabe, trim away the stalk, conserving the blossoms and leaves.  Cut the leaves into 5 cm (2 ½ inches) pieces
2. Bring about 3 l of water to boil.  Add 1 ½ tablespoons cooking salt, add the broccoli rabe.  Stir well and cook for about 10 minutes.  Remove the broccoli rabe with a fine mesh strainer.  Set aside
3. Bring the broccoli water back to boil and add the pasta.  Cook for about 5-6 minutes (until “al dente”)
4. While pasta is cooking , in a large frying pan over medium-low heat, sauté garlic, chili peppers and chopped anchovies in olive oil for 1 minutes. Mix in broccoli rabe and sauté for 2 minutes, stirring constantly to mix all the ingredients well
5. When the pasta is done, drain it and add it to the vegetable mix.  Toss it for 1 minute
6. Place the pasta on a serving plate and serve with freshly grated pecorino cheese.

 Note: When you buy broccoli rabe make sure that the bottoms of the stems are relatively firm and green.  If you prefer using dry pasta instead of fresh, you should reduce the amount to 350 g (12.5 oz).  -Paola

Torta Pasqualina (Easter Pie)

23 Mar

Torta Pasqualina is a rustic savory pie typical of Liguria, filled with spinach, ricotta cheese and eggs. You can serve it as an appetizer with a nice sparkling wine (I love it with my Prosecco) or as an antipasto (starter) anytime of the year, but this dish is really part of the traditional Easter (Pasqua) dinner or served at the Easter Monday (little Easter, “Pasquetta”) picnic with family and friends. In fact you can prepare it a day in advance and enjoy it cold the next day. Torta Pasqualina traces its origins back to 1400 when it was prepared to celebrate Easter Sunday after Lent, a period of time marked by fasting. Catholics during Lent historically gave up more than just meat dishes – eggs, milk, and even fat were abandoned. According to the ancient tradition, 33 pastry layers were used (like Jesus’ age at his passing), while the eggs represented life, fertility and renewal. The ingredients (spinach, cheese, eggs and pastry) were something special, a celebration of the Easter feast. Nowadays the recipe calls for a fewer layers of pastry, and artichokes sometimes substitute spinach. Torta Pasqualina is an absolute hit for everybody who eats it – even kids like it! The perfect combination of spinach, sautéed onions and creamy ricotta cheese is its secret while the hidden eggs add a special surprise.

TORTA PASQUALINA (EASTER PIE)
Preparation time: 1 h           Baking time: 40 min.       Servings: 6

Torta Pasqualina small

INGREDIENTS
1 kg (about 2 pounds) fresh spinach leaves
4 tablespoons olive oil (Extra Virgin)
1 medium onions, finely sliced
1 sprig fresh marjoram
500 g (2 cups) ricotta cheese
1 egg + 6 hard boiled eggs
100 g (1 cup) grated Parmesan
460 g – 2 sheets (1 pound) puff pastry
Salt , nutmeg and freshly ground pepper

DIRECTIONS
Preheat the oven to 170°C -180 °C (350 °F)
1.Boil 6 eggs and shell them. Set aside
2. Wash the spinach several times to remove all the soil. Drain well then steam for 3-4 minutes. Cool, drain and squeeze dry
3. In a large skillet on medium-low heat sauté the onion with olive oil until onion is soft and translucent. Add the spinach and mix well with the onion. Cook for about 1-2 minutes. Season with salt and marjoram
4. In a large bowl cream one fresh egg with the ricotta cheese and Parmesan. Add the vegetable mix and season with freshly ground pepper and nutmeg. Set aside
5. Place one puff pastry sheet in a 25 cm (10 in) baking dish and prick the pastry bottom with the tines of a fork (four or five times is sufficient). Fill with half of the vegetable mix. Hollow out 6 depressions in the filling with the back of moist spoon. Place the boiled eggs in them and pour in the rest of the vegetable mix. Cover with the second sheet
6. Bake until golden, about 40 minutes. It is delicious when eaten freshly baked and a little bit warm, but it is also a treat to enjoy cold the next day.

Note: You can substitute spinach with new Swiss chard. You can store the pie in an airtight container in the refrigerator for 3 days. You can also freeze it after cooking. I would suggest to cut into slices and freeze each single slice. Before serving, defrost in the fridge and heat it in the oven.  -Paola

Frittata al Forno con Zucchine (Baked Zucchini Frittata)

8 Mar

Frittata is an Italian-style omelette made with beaten eggs and milk, and enriched with various ingredients such as vegetables, cheese, ham, pasta and herbs. For example in the Neapolitan tradition frittata is commonly made with left over pasta (spaghetti, angel-hair, etc.), ham and cheese. The word frittata comes from the Italian verb “friggere” to fry. In fact, the egg mixture is usually fried in a frying pan on the stove, but nowadays there is a baked version as well, like my recipe below. Actually, I prefer this method because makes the frittata lighter on the stomach (no frying) and therefore easier to digest. The addition of zucchini makes this recipe a tasty, dietetic and nutritious dish. Zucchini is a rich in water, vitamins (E, C and folic acid) and potassium, while the eggs are highly rich in proteins. With eggs being one of the most readily available and low cost ingredients, frittata has long been a humble dish. Frittata di cipolle (onion frittata) was a typical workers’ lunch. You can serve it warm as a complete meal, at room temperature or even enjoyed cold the next day for a quick lunch or picnic. There is a technical difference between frittata and omelette: the omelette’s ingredients are placed on the omelette while it is cooking, while when making a frittata you must mix the eggs and the other ingredients together before cooking. You may have heard the expression “hai fatto una frittata” … perhaps understandably, that means you made a mess! This expression comes the fact that frittata is usually made at the last minute with the ingredients available in the fridge, left overs, too!! So the result is not always guaranteed!!!

FRITTATA AL FORNO CON ZUCCHINE (BAKED ZUCCHINI FRITTATA)
Preparation time: 35 minutes     Baking time: 15-20 minutes     Servings: 4

zucchine frittata small

INGREDIENTS
200 g (2 medium) potatoes, boiled and diced
450 g (4 medium) zucchini, thinly sliced
½ medium onion, thinly sliced
4 tablespoons olive oil (Extra Virgin)
50 g (½ cup) Parmesan cheese
6 eggs, separate egg yolk from egg white

1 tablespoon parsley, finely chopped
Salt and fresh ground pepper to taste

DIRECTIONS
Preheat oven to 160°C -170°C (325°F -350°F)
1. Wash potatoes under running water. Put potatoes in a pan and cover with cold water. Turn on the heat and bring to boil. Cook for about 6-8 minutes until potatoes are done but not soft. Cool, peel and dice them
2. While potatoes are cooling, wash zucchini under running water and trim ends and slice
3. In a large saucepan over medium-low heat, sauté onions and zucchini in olive oil, stirring frequently for about 10-15 minutes. Stir in parsley and potatoes
4. In a large bowl beat egg yolks, add the vegetable mixture, Parmesan, salt and pepper
5. In a medium bowl beat the egg whites
6. Combine egg whites with vegetable mix and pour it in a 24 cm (10 in) ceramic or glass pie or tart baking dish previously covered with baking paper (see note)
7. Bake for about 15 minutes or until custard is set and golden on top
8. Remove from the oven and allow to cool on a rack for about 7-8 minutes. Serve warm. You can enjoy the frittata cold too.

Note: Baking paper is very convenient to use. I will tell you a small trick. Cut the paper (bigger than the baking dish), wash under running water and wring the water out. Place the paper in the baking dish. Let the edges go partially up the side of the pan to keep any batter from slipping into the baking dish. This method allow a better adhesion of the paper to the dish wall. Frittata should be stored in an airtight container as water and humidity can alter the texture and taste. If you add greens or vegetables you should first sautee to enhance the flavor. Paola

Insalata di Finocchi e Arance Rosse (Fennel and Blood Orange salad)

2 Mar

This year’s citrus season is almost over, but we still have time to enjoy this delicious Sicilian salad made with fennel bulb, blood orange and olives. This is a simple and refreshing dish, perfect to serve either for a light lunch or as a side dish with dinner. The sweet and beautifully colored blood oranges complement the delicate anise taste of fennel, while the addition of olives makes this recipe a symphony of flavors for your palate. The brilliant red flesh color of Sicilian blood oranges is due to an antioxidant compound which – although found in many fruits but uncommon to citrus fruit – makes this citrus very special! Fennel is indigenous to the Mediterranean area, but it is now widely cultivated in many other parts of world as well. The fennel bulb, foliage and the seed are used in various culinary traditions and medicinal purposes. Fennel is very refreshing, purifying and diuretic. The bulb is a crisp vegetable that can be used in many ways: sautéed, braised, grilled, stewed, au gratin or just eaten raw in salads, seasoned with extra virgin olive oil and lemon juice. This salad is not only very beautiful, but it is also delightful and healthy. It is rich in vitamin C, antioxidants and nutrients, and it helps keep you healthy too!

INSALATA DI FINOCCHI E ARANCE ROSSE (FENNEL AND BLOOD ORANGE SALAD)
Preparation time: 15 minutes                   Servings: 4

insalata di finocchi small

INGREDIENTS
Salad
2 medium fennel bulbs, thinly shaved with a mandolin or meat slicer
2 blood oranges, peeled
12 green olives or black (pitted and sliced) + 4 whole pitted

Dressing
4 tablespoons olive oil (Extra Virgin)
1 teaspoon lemon juice
Salt and pepper to taste

DIRECTIONS
1. Soak the unpeeled oranges in boiling water for about 5 minutes. This method facilitates removal of the white membrane when peeling
2. Using a sharp knife peel the oranges and remove membrane. Cut them into the shape you prefer. I like one in small pieces and the other one in slices
3. Coarsely slice the olives
4. Wash the fennel bulbs, slice off the stalk and any fronds, and thinly slice
5. In a large bowl combine the orange pieces, the fennel and the sliced olives. Toss with the dressing
6. Arrange the sliced orange on a serving plate. Place the salad mix in the middle and decorate with the whole olives. Serve immediately.

Note: When you purchase your vegetables choose fresh fennel; it is even better if you use male fennel without sprouts. Oranges should be firm and plump, and feel free to use either green or black olives, whichever you prefer. Fennel turns brown (oxidizes) quickly, so as soon as you slice it, quickly add the dressing to it. The presence of lemon juice will slow down the process. -Paola

Pasta e Fagioli (Pasta with Beans)

21 Jan

Pasta e fagioli, comfort food during cold winter days, is one of the most traditional, widespread and appreciated Italian recipes.  In fact in the Mediterranean diet, beans are commonly used to prepare nutritious and healthy dishes, and for this reason they are known as “the meat of the poor people”, rich in carbohydrates, proteins, vitamins, minerals, soluble fibers, as well as being low in fat.  Like many other Italian recipes, this one started out as a peasant meal made of easily available and inexpensive ingredients such as beans , garlic, onion, carrots, celery, potatoes and tomatoes.  Further, it was common to use spicy cured lard, prepared seasonally each autumn during pig-slaughtering season, to add some extra flavor.  Because of its popularity, there are many variations all over the country: for example some do not include tomatoes at all; some use vegetable stock and avoid lard (making this particular version a suitable dish for vegetarians); some recipes are more soupy while others are thicker.  The type of beans may vary as well, usually either borlotti beans or cannellini beans, fresh or dried.  I prefer borlotti beans because of their nutty sweet flavor and creamy texture.  These light brown beans with red marks are a variety of kidney beans commonly cultivated in Italy but originally from America.  Italians enjoy these types of beans in summer as well, preparing an excellent cold bean salad flavored with fresh sliced onions, ground pepper and tossed with olive oil.

PASTA E FAGIOLI (PASTA WITH BEANS)
Preparation time: 12 hrs.               Cooking time: 1 hr                 Servings:4

pasta e fagioli 2 small

INGREDIENTS
300 g (1 ½ cups) dried borlotti beans
1 whole garlic clove + 1 sliced
2 sprigs fresh rosemary
4 bay leaves
4 tablespoons olive oil (Extra Virgin)
40 g (¼ cup) spicy cured lard or bacon, diced
1 medium size onion, finely sliced
2 carrots, diced
2 celery stalks, finely sliced
2 small potatoes, peeled and diced
1 ½ l (about 5 cups) vegetable or chicken stock
1 tablespoon tomato sauce
280 g (10 ounces) ditaloni or small pasta (artisanal pasta)
Salt and freshly ground pepper to taste

DIRECTIONS
Day 1
You should start the day before you plan to serve the pasta e fagioli.
1.Rinse the beans under running water, then place in a large glass bowl with 1 garlic clove, 1 rosemary sprig and 2 bay leaves.  Fill bowl with plenty of water to cover generously (about 5 cm, 2 inches above the level of the beans).  Cover with a lid and soak overnight.
Day 2
1.In a large heavy pot with lid, sauté the lard (or bacon) on medium heat with the sliced garlic, onion, carrots, celery and potatoes in olive oil for about 7 minutes, stirring frequently
2.Remove the excess water (if there is any), discarding the garlic, rosemary and bay leaves as well, then add the beans, the fresh herbs (1 rosemary sprig and 2 bay leaves) and tomato sauce to the pot.  Cover with stock, bring to gentle simmer.  Cover pot and cook for about 35-40 minutes, until beans are tender
3.Add the pasta, stir and cook for 10 minutes until pasta is just al dente (follow the package cooking direction).  Season with salt and pepper.  Ladle soup in the serving bowl and drizzle with olive oil.

Note: Dried beans versus canned beans.  You can reduce preparation time by using canned beans  (one pound of dried beans = about 6 cups of cooked beans).  I personally prefer dried beans, although it is more time consuming, the results are worth the effort!!!  Dried beans come out being tender and flavorful, not at all mushy and dull as can be the case with canned ones.  Important tip:  Add salt only at the end when the beans are tender, because salt will prevent them from absorbing water, which will, of course, then slow down the cooking process.  -Paola

Gnocchi di Patate al Pomodoro (Potato Dumplings with Tomato Sauce)

7 Jan

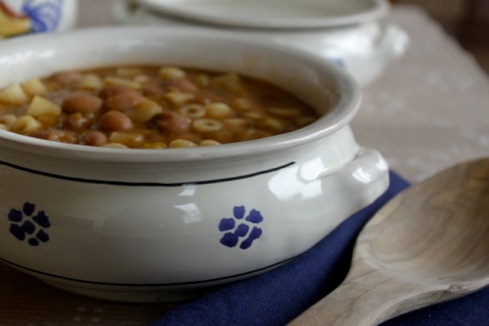
Gnocchi di patate (potato dumplings) is an Italian classic. These dumplings are small pieces of potato dough, usually round or oblong in shape, which are boiled in water and then served with various toppings such as tomato sauce and fresh basil, oil olive and grated Parmesan cheese, Bolognese sauce or even Brasato al Barolo sauce. I personally like gnocchi (pronounced gnawk-KEY) with tomato sauce because the fresh taste of the tomato and basil blends well with the starchiness of the potatoes. The texture is soft, and the simple ingredients are just potatoes, flour and egg. The taste, though, is delicate and inviting. Gnocchi is an easy, fast and light recipe to prepare, although you do need to take care in minimizing the amount of flour used. You can enjoy this dish as first course (like we Italians do) or as a main dish, if you prefer. It is an excellent vegetarian dish (it does contain eggs and dairy products, though). I grew up making gnocchi al cucchiaio (a typical Lombard recipe) with my mom, especially on Friday. It was part of our Friday meal, as it is in Verona, especially during the Carnival. In fact, gnocchi is considered a weekday dish; in Rome it is frequently served on Thursday. In Naples, though, it is known as a festive dish on Sunday. At the time the Americas – and potatoes – were discovered by the Europeans, some varieties of dumplings were already present in the Old World, especially in Lombardy. They were prepared by mixing bread crumbs, milk and almonds and were called Zanzarelli. In the seventeenth century, however, the original recipe underwent some changes in both the composition of ingredients and in its name: it took the name of malfatti and flour, water and eggs were used instead of almonds and bread. With the introduction of potatoes from the Americas, the popularity of potato gnocchi spread and slowly some of the previous varieties disappeared.


GNOCCH DI PATATE AL POMODORO (POTATO DUMPLINGS WITH TOMATO SAUCE)

Preparation time: 1 h tomato sauce + 20 min. gnocchi           Serving: 4

Gnocchi small

INGREDIENTS
Tomato sauce
900 g (2 pounds) ripe S.Marzano or Roma tomatoes peeled and coarsely chopped
1 medium onion, finely chopped
2 garlic cloves, finely chopped
1 carrot, finely chopped
1 celery stock, finely chopped
2 tablespoon olive oil (Extra Virgin)
5-6 basil leaves
Salt and freshly ground pepper to taste

Gnocchi
900 g (2 pounds) unpeeled potatoes (Patate a pasta gialla di Avezzano, Yukon Gold potatoes)
240 g (1 ½ cups) all-purpose flour
1 egg
1 tablespoon olive oil (Extra Virgin)
Salt to taste
Greated Parmesan cheese to serve

DIRECTIONS
Tomato sauce
1. In a large, heavy sauce pan, heat the oil over medium heat and sauté the all vegetables except the tomatoes for about 2-3 minutes
2. Add the tomatoes and the basil
3. Cover with a lid and cook for about 30 minutes; remove the lid and cook for additional 20 minutes, stirring occasionally
4. Puree the sauce with a blender. Season with salt and pepper. Set aside and keep warm.

Gnocchi al cucchiaio (Gnocchi using the spoon method)
1. Cook the potatoes until just tender either by boiling or baking. The potato flesh for gnocchi should be dry, therefore it is better to boil the potato in the skin to prevent water absorption. Drain well and set aside until just cool enough to remove the skin. The potatoes should be warm, otherwise the flour and the potato puree will not bind with the egg
2. Put the warm potatoes through a potato ricer (never a mixer) into a bowl, season to taste with salt. Add the egg and olive oil, incorporate the flour and mix just enough until the dough is formed. Be careful not to overwork it; the dough will be lighter and the texture softer if you are able to minimize the flour used)
3. Bring a large pot of salted water to a slow boil. Drop teaspoon-sized balls of dough in the boil water
4. The gnocchi are done as soon as they float to the top, after only about 10-15 seconds (no longer or they will fall apart in the water!!). Remove with a slotted or spider spoon and place on a preheated serving dish. Repeat with the remaining dough and toss gently with the tomato sauce and grated Parmesan cheese.
5. Before cooking the whole batch, I recommend making a couple of test gnocchi to see if the dough holds together. The cooked gnocchi should be firm but not tough and should not fall apart in the water. If they fall apart, you should add 1-2 tablespoons of flour. If they are tough, then you’ve used too much flour! I find that the spoon method is easier and requires less flour in comparison to the rolling method, thereby allowing you to make very tender gnocchi.

Note: The type of potatoes is crucial (I strongly recommend to use patate farinose, rich in starch), as well as the use of a potato ricer, which lets the steamy moisture out of the hot potatoes. In case fresh tomatoes are not available, try using S. Marzano canned tomatoes. One final note of caution … make sure you don’t mispell or mix up the term gnocco (singular of gnocchi) with gnocca, which means a “hot woman”!!!! 😉  -Paola

Pizzoccheri

3 Dec

Pizzoccheri is a homey dish for the cold months, linked to the traditions of the Alpine farmers.  The original recipe comes from a small village named Teglio in Valtellina (Lombardy), a well known ski area in the heart of the Alps.  The name pizzoccheri seems to derive either from the root of the word, piz (pezzetto, piece of pasta) or from the word pinzare (to staple – to press) referring to the shape of the pasta (short and thin strips).  In fact, pizzocheri are a type of short tagliatelle or fettuccine pasta made of 80% buckwheat flour, a brownish-gray flour with a nutty flavor, and 20% wheat flour.  The rustic flavor of the pasta pairs well with the smooth taste of vegetables such as Savoy cabbage, potatoes and the intense flavor of the Valtellina’s cheeses, such as bitto and casera DOP (Protected Geographical Status).  Casera cheese is made from partially-skimmed cow milk, and its origins date back the sixteenth century.  It has a nutty and sweet taste; instead bitto cheese has a stronger and more intense taste due to the presence of goat milk (about 20%).  Pizzoccheri is by no means a light dish, but at the same it is a hearty and tasty treat, especially after a strenuous day on the ski slopes.  It is an excellent vegetarian dish (it does contain dairy products, though).  You can enjoy it as first course or as a main dish.

PIZZOCCHERI

Preparation time: 30 minutes                     Servings: 4

Pizzoccheri 3 piccola

INGREDIENTS
225 g(½ pound) Savoy cabbage, finely chopped
225 g (½pound) potatoes, peeled and chopped in small cubes
100 g (7 tablespoons) unsalted butter
2 whole garlic cloves
5 fresh sage leaves
340 g (12 oz) pizzoccheri pasta
70 g (2.5 oz) bitto cheese, thin slices
130 g (4.5 oz) Valtellina casera cheese, thin slices
100 g (1 cup) grated Parmesan cheese
Salt and freshly ground black pepper

DIRECTIONS

  1. In a large pan the boil 3 l salted water, add the cabbage and boil for 5 minutes.  Drain well and set aside.  Add the potatoes to the same pan of boiling water, cook for 5 minutes or until tender.  Drain well and set aside, reserving the water to cook the pasta
  2. Sauté one garlic clove in half the butter in a large skillet over a medium-low heat.  Add the cabbage, potatoes and sauté gently.  Cover to keep warm and moist
  3. Meanwhile, cook the pasta in the vegetable water, according to package cooking instructions (12-15 min.).  Drain well and add to the warm vegetable mix in the skillet.  Cook for less than 1 minute, stirring very gently
  4. Heat the remaining butter with the sage and the other garlic clove in a small pan over a medium flame.  Remove the garlic clove.  Put half the pasta and vegetable mix in a heat resistant serving dish.  Cover with half of the bitto and half of the casera cheese.  Pour half the butter and sage on top, then sprinkle with half of the parmesan cheese.  Season to taste with freshly ground pepper.  Repeat this step with the remaining products.  Serve hot!  It is important that the pasta and the vegetables are hot to melt the cheese.  To melt the cheese thoroughly you can also put the pizzocheri in a preheated oven at 170°C (350°F) for 4-5 minutes.

Note: You can substitute the cabbage with either Swiss chard or spinach.  If you cannot find either casera or bitto cheese , I recommend  to use fontina cheese, another mountain cheese from Valle d’Aoasta.  You can buy either dry pizzoccheri, but fresh pasta might be available in specialty stores, too. The cooking time is slightly different, check the directions on the packaging.  -Paola